Knife sharpening angle guides are invaluable tools for both novice and experienced cooks, ensuring consistent and precise blade edges. These guides simplify maintaining optimal cutting performance.
Reddit discussions highlight how these tools empower beginners, while resources like Kyoku Knives emphasize the importance of correct angles for various blade types.
What is a Knife Sharpening Angle Guide?
A knife sharpening angle guide is a tool designed to help maintain a consistent angle while sharpening a blade. These guides, discussed on platforms like Reddit’s r/coolguides, are particularly helpful for those new to sharpening, eliminating the guesswork involved in achieving the correct edge.
They come in various forms – magnetic, clip-on, handheld, and adjustable – each offering a different method for securing and maintaining the desired angle. Essentially, they act as a physical reference, ensuring the blade is presented to the sharpening stone or steel at the optimal degree for its intended purpose, as highlighted by resources like santokuknives.
Why Use an Angle Guide?
Using an angle guide dramatically improves sharpening consistency, a key factor in blade performance. As noted in online discussions, many find sharpening intimidating, and guides remove the learning curve. Maintaining the correct angle – whether 15 degrees for Japanese knives or 20 for Western styles – is crucial, and guides ensure accuracy.
Without a guide, achieving a uniform edge is challenging, leading to inconsistent cuts. Guides prevent rounding of the blade and ensure optimal sharpness, as emphasized by Tumbler Rolling Knife Sharpener. They’re beneficial for all skill levels, promoting efficient and effective sharpening.

Understanding Knife Sharpening Angles
Knife sharpening angles dictate blade performance; Japanese knives typically require 15-degree angles, while Western knives benefit from 20-degree edges for durability and sharpness.
Common Sharpening Angles for Different Knives
Selecting the correct sharpening angle is crucial for optimal knife performance, varying significantly between knife styles and intended uses. Western knives, designed for heavier tasks like chopping, generally benefit from a 20-degree angle, providing a robust and durable edge.
Conversely, traditional Japanese knives, renowned for their precision slicing capabilities, are typically sharpened to a narrower 15-degree angle. This creates a significantly sharper, albeit more delicate, edge. Some single-bevel Japanese blades even utilize angles as low as 10-15 degrees on one side.
Understanding these distinctions ensures you maintain the intended characteristics of your knives, maximizing their effectiveness and longevity.
Western Knives: 20-Degree Angle
A 20-degree sharpening angle is standard for most Western-style kitchen knives, including chef’s knives, paring knives, and utility knives. This angle strikes a balance between sharpness and durability, making it suitable for a wide range of cutting tasks.
The broader angle creates a stronger edge that can withstand more forceful impacts, like chopping through bones or dense vegetables. While not as acutely sharp as a 15-degree Japanese edge, a 20-degree angle offers excellent performance and requires less frequent sharpening.
Maintaining this angle consistently ensures a reliable and long-lasting edge for everyday kitchen use.
Japanese Knives: 15-Degree Angle
Japanese knives, renowned for their exceptional sharpness, typically utilize a 15-degree sharpening angle. Santokuknives.com specifies a 10-15 degree angle for single-bevel blades, demanding precision. This acute angle creates an incredibly keen edge, ideal for delicate slicing and precise cuts like sashimi or sushi preparation.
However, this sharpness comes with a trade-off: a 15-degree edge is more fragile than a 20-degree Western edge. It requires more careful handling and more frequent sharpening to maintain its performance.
Mastering this angle unlocks the full potential of Japanese cutlery.
The Impact of Angle on Blade Performance
The sharpening angle profoundly impacts a knife’s performance characteristics. A smaller angle, like 15 degrees for Japanese knives, creates a thinner, sharper edge, excelling at slicing through delicate foods. However, this edge is more prone to chipping and rolling.
Conversely, a larger angle, such as 20 degrees for Western knives, produces a more durable, robust edge, better suited for tougher tasks like chopping. Tumbler Rolling Knife Sharpener highlights this crucial relationship between angle, steel type, and edge geometry.
Choosing the right angle balances sharpness and durability.

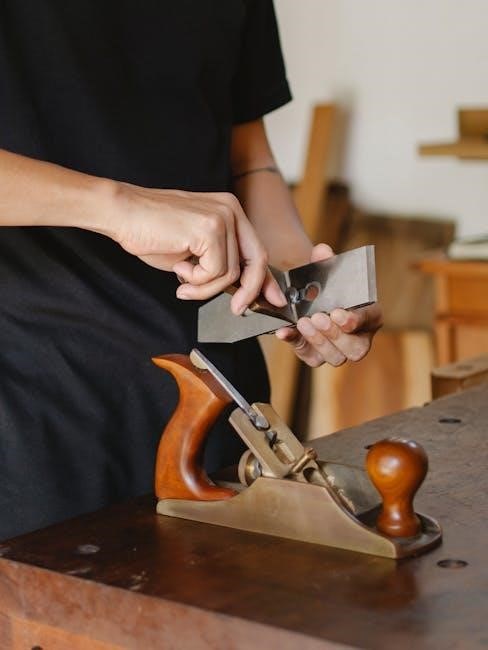
Types of Knife Sharpening Angle Guides
Various angle guides exist, including magnetic, clip-on, handheld, and adjustable options. Each type offers unique benefits for achieving consistent sharpening angles and optimal blade performance.
Magnetic Angle Guides
Magnetic angle guides securely attach to the blade, providing a consistent angle during sharpening. These guides typically feature a strong magnet that holds the guide firmly in place, even during vigorous sharpening motions.
They are often favored for their simplicity and ease of use, making them a good choice for beginners. Magnetic guides are generally compatible with various knife sizes and shapes, offering versatility. However, some users may find that the magnetic hold isn’t strong enough for heavier blades or aggressive sharpening techniques.
Proper alignment is crucial for optimal results with these guides.
Clip-On Angle Guides
Clip-on angle guides attach to the spine of the knife blade, establishing a fixed sharpening angle. These guides are known for their stability and secure fit, minimizing slippage during the sharpening process. They often feature adjustable settings, allowing users to customize the angle based on the knife type – 15 degrees for Japanese blades or 20 degrees for Western knives.
These guides are particularly useful for maintaining consistent angles across the entire blade length. However, some models may not be compatible with all knife shapes or sizes, potentially limiting their versatility.
Handheld Angle Guides
Handheld angle guides are compact and portable, offering flexibility for sharpening knives in various locations. These guides typically consist of a small block or wedge that rests against the blade, guiding the sharpening stone at the desired angle. They require more user control and practice to maintain consistency compared to clip-on or magnetic guides.
Their affordability and ease of storage make them a popular choice for beginners. However, achieving a uniform edge can be challenging without proper technique, potentially leading to inconsistencies in the sharpening angle.
Adjustable Angle Guides
Adjustable angle guides represent a versatile solution for sharpening diverse knife types, accommodating both Western and Japanese blade geometries. These guides feature a mechanism allowing users to precisely set and lock in the desired sharpening angle, typically ranging from 10 to 20 degrees.
This adaptability is crucial, as different knives require specific angles for optimal performance. While often more expensive than fixed-angle guides, their flexibility and precision make them a worthwhile investment for serious knife enthusiasts.
Using a Sharpening Angle Guide: A Step-by-Step Approach
Sharpening with an angle guide involves secure attachment, consistent pressure, and maintaining the set angle during whetstone or steel use for a refined edge.
Preparing Your Knife for Sharpening
Before utilizing an angle guide, thorough knife preparation is crucial for optimal results. Begin by cleaning the blade to remove any food residue or debris, ensuring a smooth sharpening surface.
Inspect the blade for chips or significant damage; address these issues before proceeding with sharpening. A stable work surface is essential, and consider using a non-slip mat to prevent movement during the process.
Familiarize yourself with the knife’s existing bevel angle, as this will inform your guide setting. Proper preparation sets the stage for a consistently sharp and effective edge.
Attaching the Angle Guide
Securely attaching the angle guide is paramount for consistent sharpening. Magnetic guides simply clamp onto the blade’s spine, while clip-on versions require careful positioning along the bolster.
Handheld guides necessitate a firm grip, ensuring the guide remains stable throughout each stroke. Adjustable guides demand precise angle selection based on your knife type – 15 degrees for Japanese blades, 20 for Western.
Double-check the guide’s alignment with the existing bevel before sharpening, guaranteeing accurate angle maintenance and a refined, sharp edge.
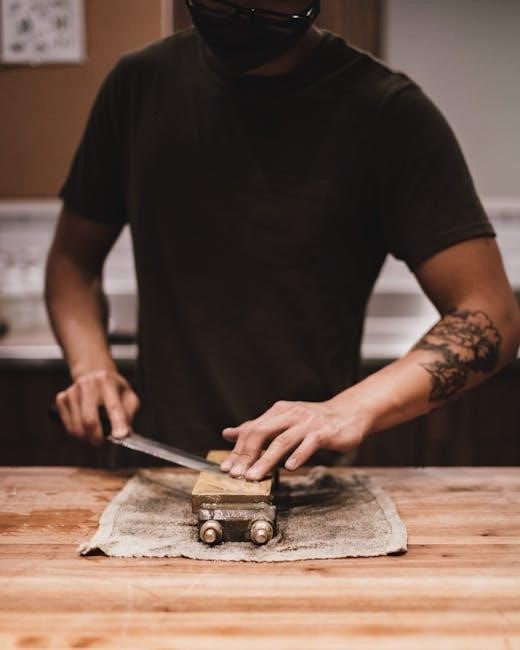
Sharpening with a Whetstone
Utilizing a whetstone with an angle guide involves consistent, controlled strokes. Maintain the guided angle throughout each pass, applying moderate pressure. Lubricate the stone with water or honing oil to prevent clogging and ensure smooth sharpening.
Begin with a coarser grit to establish the bevel, then progress to finer grits for refinement. The “Sharpie trick” – coloring the edge and checking for removal – verifies angle consistency.
Alternate sides with each stroke, maintaining the angle, until a burr forms along the entire edge.
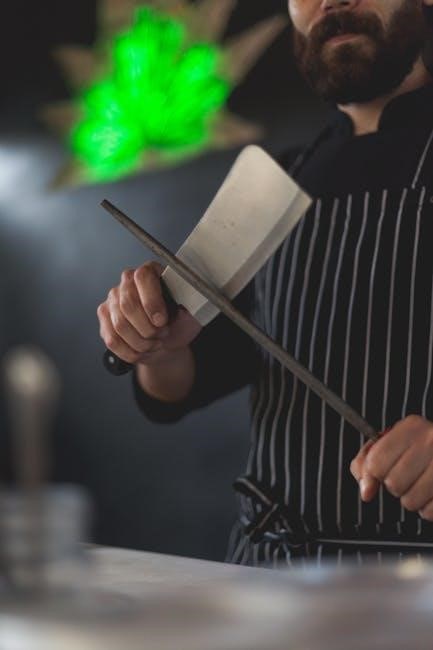
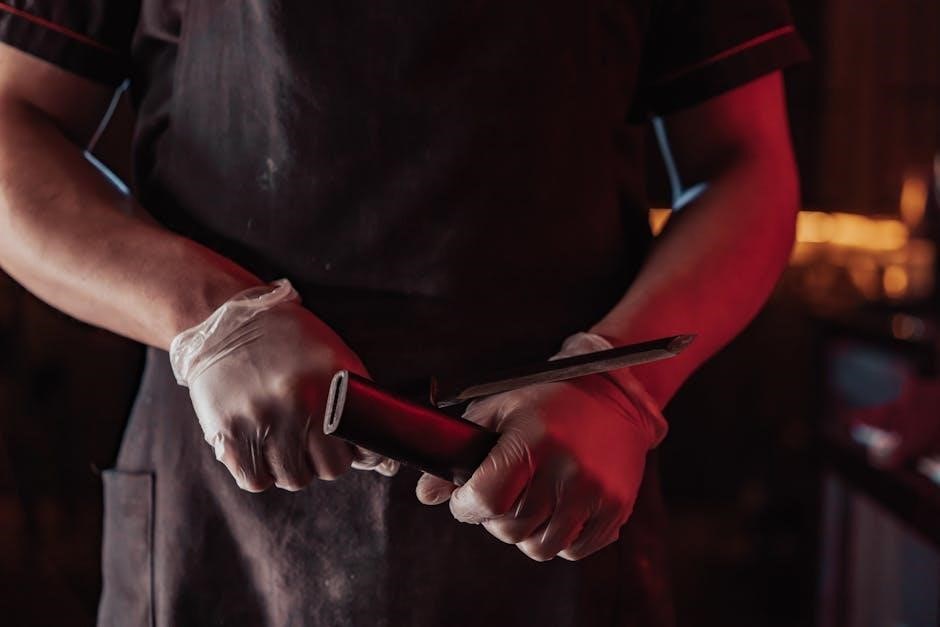
Sharpening with a Sharpening Steel
Employing a sharpening steel alongside an angle guide primarily realigns the blade’s edge, rather than removing significant material. Maintain the angle established by the guide, drawing the knife across the steel in a sweeping motion.
Apply light pressure, alternating sides with each stroke. Consistent angle maintenance, verified by the “Sharpie trick”, is crucial for effective realignment.
This technique is best for regular maintenance between whetstone sharpenings, preserving the sharpness achieved through more aggressive methods.
Testing Sharpness After Sharpening
Post-sharpening tests, like the paper, tomato, or arm hair tests, verify edge quality. These simple methods quickly assess if the desired sharpness and angle were achieved.
The Paper Test
The paper test is a widely recommended, straightforward method for evaluating a knife’s sharpness after honing or sharpening. Take a sheet of standard printer paper and attempt to slice cleanly downwards through it, holding the paper vertically.
A truly sharp knife will glide through the paper effortlessly, creating a clean, smooth cut without tearing or folding. If the knife tears, catches, or requires significant pressure, it indicates the edge isn’t yet sufficiently sharp and requires further attention.
This test assesses the initial bite of the blade, revealing if the angle and edge refinement were successful.
The Tomato Test
The tomato test provides a practical assessment of a knife’s sharpness, moving beyond the simplicity of the paper test. Select a ripe, but firm, tomato and attempt to slice through its skin without applying downward pressure.
A properly sharpened knife will effortlessly pierce the skin and slice through the tomato with a smooth, sawing motion, requiring minimal force. Resistance or crushing indicates a dull blade needing further sharpening.
This test evaluates the knife’s ability to handle delicate materials, demonstrating real-world cutting performance.
The Arm Hair Test
The arm hair test is a classic, albeit slightly unconventional, method for gauging knife sharpness. Carefully and gently attempt to shave a few hairs from your forearm. This test should be performed with extreme caution to avoid injury.
A truly sharp knife will cleanly slice through the hairs without dragging or pulling. If the knife catches or requires pressure, it indicates the blade isn’t sufficiently sharp and requires further attention.
Remember, this test is a sensitive indicator, revealing even subtle dullness.

Choosing the Right Angle Guide for Your Needs
Selecting the ideal guide depends on material quality, knife compatibility, and user-friendliness. Consider adjustability for diverse blades and prioritize durable construction for longevity.
Material of the Guide
The material of a knife sharpening angle guide significantly impacts its durability and performance. Many guides utilize robust materials like hardened plastics or stainless steel, offering longevity and resistance to wear. Plastic guides are often more affordable and lightweight, suitable for casual use.
However, stainless steel provides superior stability and precision, especially crucial for consistent sharpening. Some guides incorporate ceramic components for smooth gliding and minimal friction against the blade. Ultimately, the best material depends on your budget, sharpening frequency, and desired level of precision.
Consider the guide’s resistance to corrosion and its ability to withstand repeated use without deformation. A well-constructed guide, regardless of material, will contribute to more accurate and efficient sharpening.
Compatibility with Your Knives
Ensuring compatibility between your angle guide and knives is paramount for effective sharpening. Different knives—Western versus Japanese—require distinct sharpening angles (15-20 degrees). Guides must accommodate these variations, offering adjustability or specific configurations.
Consider blade thickness and width; some guides are better suited for wider blades, while others excel with thinner profiles. Universal guides often work well, but specialized guides may be necessary for unique blade shapes.
Verify the guide’s clamping mechanism securely fits your knife’s heel and spine without causing damage. A proper fit guarantees consistent angle maintenance throughout the sharpening process, leading to a sharper, more durable edge.
Ease of Use and Adjustment
User-friendliness is crucial when selecting a knife sharpening angle guide, especially for beginners. Intuitive designs minimize the learning curve, allowing for quick and accurate setup. Look for guides with clear markings indicating the sharpening angle, simplifying adjustments.
Adjustability is key; a versatile guide accommodates various knife types and desired edge geometries. Smooth, secure adjustments prevent slippage during sharpening, maintaining consistent angles.
Consider the clamping mechanism – it should be easy to attach and detach without excessive force. A comfortable grip and stable base further enhance usability, promoting a safe and efficient sharpening experience.
Maintaining Your Angle Guide
Regular cleaning and proper storage are vital for longevity. Inspect your guide for wear and tear, ensuring accurate angles are maintained for optimal sharpening results.
Cleaning and Storage
Consistent maintenance extends the life and accuracy of your sharpening angle guide. After each use, thoroughly clean the guide with a soft cloth to remove any metal filings or abrasive particles.
Avoid harsh chemicals or abrasive cleaners, as these can damage the guide’s surface. For magnetic guides, a simple wipe-down is usually sufficient. Clip-on and handheld guides may require more detailed cleaning in crevices.
Store your angle guide in a dry, clean environment, away from extreme temperatures and humidity. A dedicated storage case or pouch is ideal to prevent scratches and maintain its shape. Proper storage ensures it’s ready for precise sharpening whenever needed.
Checking for Wear and Tear
Regular inspection is crucial for maintaining the accuracy of your sharpening angle guide. Examine the guide for any signs of damage, such as cracks, chips, or deformation. Pay close attention to the surfaces that contact the blade, as these are prone to wear.
For magnetic guides, check the strength of the magnet. A weakened magnet may not hold the guide securely. Clip-on guides should have a firm grip without loosening. Replace any guide exhibiting significant wear, as it can compromise sharpening precision.
Consistent checks ensure optimal performance and prevent damage to your knives.
Advanced Sharpening Techniques with Angle Guides
Mastering diverse blade shapes and repairing damaged edges becomes achievable with angle guides. Consistent angle maintenance unlocks superior sharpness and extends blade lifespan effectively.
Sharpening Different Blade Shapes
Adapting to varied blade geometries is crucial for optimal sharpening. Santoku knives, with their flatter profiles, benefit from consistent 15-degree angles, while Western chef’s knives typically require a 20-degree edge.
Angle guides assist in maintaining these specific angles across curved blades, such as fillet knives, or those with a pronounced belly, like a kukri. The key is to ensure the guide’s base remains flush against the blade’s surface throughout the sharpening stroke.
Experimentation and careful observation, utilizing the “Sharpie trick” for angle verification, will refine your technique for each unique blade shape, maximizing sharpness and longevity.
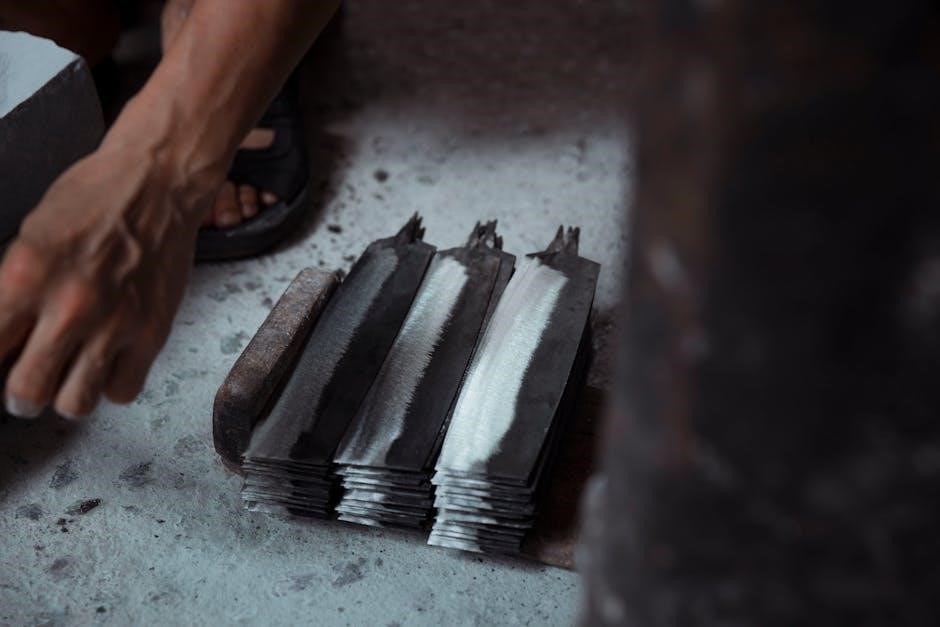
Dealing with Damaged Blades
Addressing chips and significant dullness requires a methodical approach, even with an angle guide. Begin by repairing major damage with coarser sharpening stones, focusing on re-establishing the blade’s geometry.
An angle guide becomes invaluable here, preventing further unevenness during the repair process. Maintain consistent pressure and slow, deliberate strokes. Progress to finer grits, gradually refining the edge.
Remember, severely damaged blades may necessitate professional sharpening. Patience is key; rushing can exacerbate the problem. Consistent angle maintenance with the guide ensures a restored, functional edge.
Troubleshooting Common Sharpening Issues
Common problems like inconsistent angles or scratch marks are often addressed by verifying guide alignment and pressure. Maintaining sharpness requires consistent technique and proper angle adherence.
Inconsistent Angle
Maintaining a consistent angle throughout the sharpening process is crucial for a uniform edge. If the angle varies, the blade won’t achieve optimal sharpness, resulting in uneven cutting performance. The “Sharpie trick” – coloring the blade edge and observing where the marker remains – is a fantastic diagnostic tool.
If sharpie remains in certain areas, it indicates the angle is too high in those spots. Conversely, if the sharpie is completely removed, the angle is likely too low. Regularly check your guide’s alignment and ensure consistent downward pressure during each stroke to mitigate this issue.
Scratch Marks on the Blade
Scratch marks appearing on the blade during sharpening often indicate abrasive particles or contaminants on the whetstone or the knife itself. Using a coarse grit stone initially can also contribute to noticeable scratches. Ensure your sharpening surface is thoroughly cleaned and lubricated with honing oil or water before each use.
Employing a finer grit stone for finishing passes will minimize these marks. Additionally, verify the angle guide isn’t causing friction that creates scratches. Consistent, smooth strokes, combined with a clean setup, are key to a pristine blade finish.
Difficulty Maintaining Sharpness
Reduced sharpness retention frequently stems from an incorrect sharpening angle, particularly with Japanese knives requiring a more acute 15-degree edge. Inconsistent angles, even with a guide, can create a weak or uneven edge that dulls quickly. Ensure the guide is securely attached and you’re maintaining constant pressure.
The steel quality also plays a role; softer steels require more frequent sharpening. Regularly testing sharpness using the paper or tomato test will help identify when re-sharpening is needed, preventing excessive wear and tear on the blade.
The Sharpie Trick for Angle Verification
The Sharpie trick is a simple method for verifying your sharpening angle, as suggested on Reddit. Color the edge, then sharpen; if all marker is removed, the angle is correct!
Applying Sharpie to the Blade Edge
Begin by thoroughly cleaning and drying your knife blade to ensure optimal marker adhesion. Using a permanent marker – a Sharpie works exceptionally well – carefully apply a consistent, even line along the entire bevel, or cutting edge, of the knife.
The goal is to completely coat the area that will be contacting the sharpening stone or steel. Ensure the marker line is visible and uniform; this provides a clear visual indicator during the sharpening process. A fresh marker is recommended for better visibility and accuracy.
Testing the Angle with the Sharpie Mark
After a few passes with your sharpening stone or steel, carefully inspect the blade’s edge. Gently draw the blade across the sharpening surface, maintaining your desired angle. Observe where the Sharpie marker has been removed.
If the marker is consistently removed across the entire bevel, you’ve achieved the correct angle. If marker remains, your angle is too high; lower it slightly. Conversely, if you’re removing marker higher up the blade, your angle is too low and needs adjustment.
Angle Guides vs. Freehand Sharpening
Angle guides offer consistency, ideal for beginners, while freehand sharpening demands skill and practice. Guides excel in precision, but freehand allows greater adaptability for complex blade geometries.
Pros and Cons of Each Method
Angle guides boast remarkable consistency, making them perfect for those new to sharpening or seeking repeatable results. They eliminate guesswork, ensuring a uniform edge angle across the blade’s length. However, they can sometimes limit adaptability for uniquely curved or damaged blades;
Freehand sharpening, conversely, offers unparalleled control and flexibility. Experienced users can adjust to varying blade shapes and address specific damage effectively. Yet, mastering this technique requires significant practice and a keen sense of angle, potentially leading to inconsistencies for beginners.
Ultimately, the choice depends on skill level and desired precision.
When to Use an Angle Guide
Angle guides are exceptionally beneficial for beginners learning the fundamentals of knife sharpening, providing a stable reference point for consistent blade angles. They’re also ideal for maintaining a specific edge on knives requiring precise geometry, like Japanese blades demanding 15-degree angles.
If you’re striving for repeatable results, or lack confidence in freehand sharpening, an angle guide is a smart choice. Furthermore, they’re useful when sharpening multiple knives of the same type, ensuring uniformity.
Consider using one when precision is paramount.

Resources for Further Learning
Explore online tutorials and videos for visual guidance, and join knife sharpening communities like those on Reddit (r/coolguides) to share knowledge and tips.
Online Tutorials and Videos
Numerous online platforms offer comprehensive knife sharpening tutorials. YouTube channels dedicated to culinary skills frequently demonstrate angle guide techniques, providing visual learners with step-by-step instructions. These videos often showcase different guide types – magnetic, clip-on, and adjustable – and their application with whetstones and steels.
Websites like santokuknives.com delve into specific angles for Japanese blades, complementing video demonstrations. Searching for “knife sharpening angle guide” yields a wealth of content, from beginner introductions to advanced methods. These resources are invaluable for understanding the nuances of blade geometry and achieving a professional edge.
Knife Sharpening Communities
Engaging with online knife sharpening communities provides a supportive environment for learning and troubleshooting. Platforms like Reddit’s r/coolguides often feature discussions on angle guides, with users sharing experiences and tips. These forums are excellent for seeking advice on specific knives or sharpening challenges.
Members frequently discuss the “Sharpie trick” – a method for verifying angle consistency – and offer feedback on different guide models. These communities foster a collaborative spirit, allowing enthusiasts to refine their skills and stay updated on best practices in blade maintenance and sharpening techniques.