
Manual butter churns represent a fascinating intersection of culinary tradition and historical technology, offering a tangible link to a simpler time.
These devices, once essential in households worldwide, transformed cream into butter through physical effort and ingenious design, embodying self-sufficiency.
Today, they evoke nostalgia and a renewed appreciation for the art of homemade dairy, providing a unique and rewarding experience for enthusiasts.
Historical Significance of Butter Churns
Butter churns boast a rich history, stretching back millennia, representing a pivotal development in food preservation and culinary practices. Evidence suggests early forms existed as simple containers agitated by hand, evolving over centuries into more sophisticated designs.
Before refrigeration, butter – created through churning – offered a way to preserve the fat content of milk, providing a vital source of sustenance, particularly during leaner months. Churns weren’t merely kitchen tools; they were central to household economies and often symbols of domestic skill.
Throughout history, churn construction reflected available materials and regional traditions. Wooden churns were prevalent, but variations in shape and mechanism emerged across cultures. The dairymaid diligently churning, as described in historical accounts, highlights the labor-intensive nature of butter production.
The advent of mechanized churning in the 19th and 20th centuries diminished the everyday use of manual churns, yet they remain potent symbols of a bygone era, cherished for their historical value and connection to ancestral practices.
The Basic Principle of Butter Churning
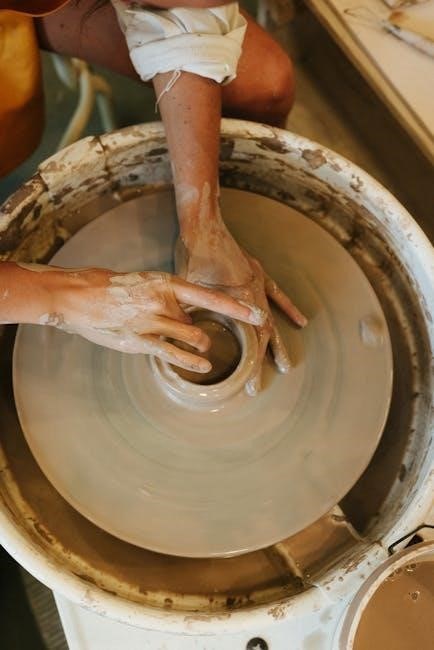
Butter churning fundamentally relies on disrupting the emulsion of cream, separating the fat globules from the liquid. Cream naturally contains fat suspended in water; agitation provides the energy needed to break down the membranes surrounding these globules.
This process, whether achieved with a dash, barrel, or rocking motion, causes the fat molecules to collide and coalesce. Initially, the cream thickens into whipped cream, but continued churning forces the fat to clump together, forming butter granules.
The resulting separation yields solid butter and liquid buttermilk. The dairymaid’s rhythmic plunging action, as historically practiced, exemplifies this principle – consistent, vigorous movement is key.
Temperature also plays a crucial role; cool cream churns more efficiently. Essentially, manual churns harness physical energy to overcome the natural stability of the cream emulsion, transforming it into a delicious and preservable dairy product through a surprisingly simple, yet effective, physical process.

Types of Manual Butter Churns
Manual butter churns come in diverse designs, each utilizing a unique method to agitate cream. Dash, barrel, and rocking churns represent the primary historical forms, offering varied mechanics.
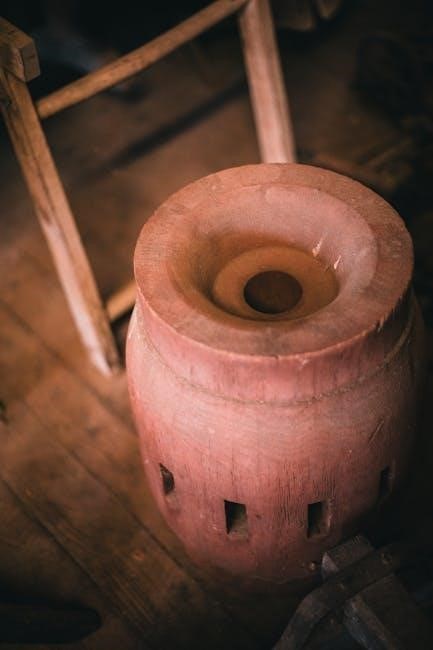
Dash Churns: Design and Operation
Dash churns, among the oldest designs, are characterized by their tall, narrow vessels, traditionally crafted from wood. These vessels hold the cream during the churning process. The defining feature is a central shaft extending from the lid, to which a dash – a long, wooden plunger with a cross-shaped or perforated end – is attached.
Operation involves a rhythmic up-and-down motion of the dash, vigorously agitating the cream. The dairymaid, as historically depicted, would employ strong arms and a steady rhythm, raising and lowering the plunger while simultaneously rotating it. This action breaks down the fat globules in the cream, eventually causing them to coalesce and form butter.
The design’s simplicity belies its effectiveness; however, it requires significant physical exertion. The splashing of cream is also a consideration, necessitating a fill level that avoids overflow. Skilled operators would maintain a consistent pace and technique to optimize the churning process, ensuring efficient butter production.
Barrel Churns: Features and Usage
Barrel churns represent a distinct evolution in manual butter-making technology, differing significantly from dash churns in both design and operation. These churns are typically cylindrical, resembling small barrels laid on their sides, and constructed from wood or, later, materials like metal. A central dasher, often consisting of multiple paddles or blades, runs through the barrel’s length.
Usage involves rotating the entire barrel along its axis, causing the dasher to churn the cream through a combination of agitation and impact. This rotation can be achieved manually, often with a hand crank, or through a more elaborate geared mechanism. The barrel’s shape and the dasher’s design promote efficient mixing and fat separation;
Barrel churns generally require less strenuous physical effort than dash churns, making them popular for larger-scale, domestic butter production. Their enclosed design also minimizes splashing, contributing to a cleaner churning experience.
Rocking Churns: Mechanics and Benefits
Rocking churns offer a unique approach to manual butter making, distinguished by their gentle yet effective churning action. These churns typically feature an oval or rectangular shape, mounted on curved rockers, allowing them to be moved back and forth. Inside, a central dasher, often with perforated blades, agitates the cream as the churn rocks.
The mechanics rely on the rhythmic rocking motion, which causes the dasher to move through the cream, breaking down the fat globules. This method is considered less jarring than dash churning, potentially resulting in a smoother butter texture. Rocking churns were particularly favored for their ease of use and relatively quiet operation.
Benefits include reduced physical strain compared to dash churns and a consistent churning action. The design also minimizes the risk of over-churning, contributing to a higher quality final product.
The Butter-Making Process with a Manual Churn
Creating butter with a manual churn is a rewarding process, demanding patience and attention to detail. It begins with quality cream and culminates in delicious, homemade butter!
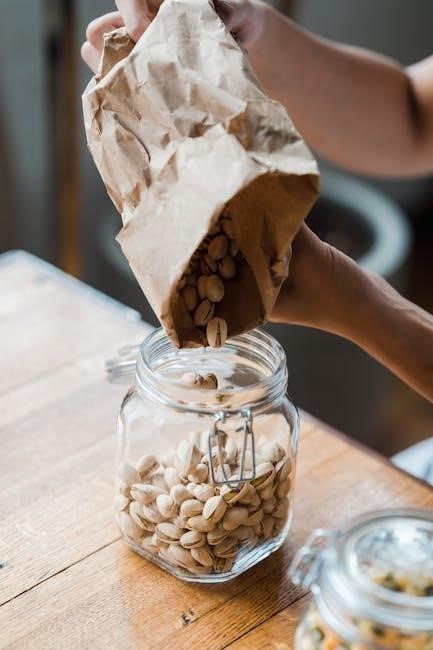
Preparing the Cream: Temperature and Fat Content
Optimal cream preparation is paramount for successful butter churning. The cream’s temperature significantly impacts the churning process; ideally, it should be between 55°F and 65°F (13°C and 18°C). Warmer temperatures encourage faster butterfat separation, but excessively warm cream can result in soft, oily butter. Conversely, overly cold cream will take considerably longer to churn.
Fat content is equally crucial. Cream with a higher fat percentage – ideally 30% to 40% – yields a greater butter quantity and a richer flavor. Heavy cream or whipping cream are excellent choices, while lighter creams may require longer churning times or produce less butter. Allowing the cream to sit undisturbed for 12-24 hours before churning allows the fat globules to coalesce, further improving the yield. Gently stirring, rather than vigorous whipping, is recommended during this resting period to avoid premature agitation.
Soured cream, traditionally used, accelerates the process, but isn’t essential; fresh cream works perfectly well with sufficient churning.
The Churning Action: Speed and Duration
Consistent, rhythmic churning is the heart of butter making. The goal is to agitate the cream vigorously enough to break down the membranes surrounding the fat globules, allowing them to coalesce and form butter. The speed isn’t about frantic motion, but rather a steady, deliberate pace. A dairymaid’s “strong arms and steady rhythm” – raising and lowering the plunger, turning it with each stroke – exemplifies this.
Churning duration varies depending on several factors: cream temperature, fat content, and the type of churn used. Generally, expect a process lasting anywhere from 20 to 60 minutes. Initially, the cream will thicken, resembling whipped cream.
As churning continues, this will eventually “break,” signaling the separation of butterfat from buttermilk. Maintaining a consistent rhythm throughout is key; slowing down or stopping can hinder the process. Patience is vital, as the break can sometimes seem to take an eternity!
Recognizing the Break: When Butter Forms
“The break” is the pivotal moment in butter churning – the point where the cream’s structure collapses and butterfat separates from the buttermilk. It’s a visual and auditory shift. Initially, the cream thickens to a whipped consistency, but continued churning causes this to change dramatically.
You’ll notice the sound within the churn alters; it transitions from a smooth sloshing to a more choppy, slapping sound. Visually, the cream will appear to lose its uniform texture, becoming grainy and lumpy. Small flecks of yellow – the emerging butter – will become visible suspended in the milky liquid.
Buttermilk will begin to pool at the bottom of the churn. This separation is the definitive sign of the break. Continued churning after the break can overwork the butter, making it soft and difficult to work with, so attentive observation is crucial.
Working with the Butter
Freshly churned butter requires further refinement to achieve optimal flavor and texture. This involves separating the butterfat, removing residual buttermilk, and incorporating desired seasonings.
These steps transform the churned product into a delicious, spreadable delight.
Washing the Butter: Removing Buttermilk
Washing the butter is a crucial step following churning, significantly impacting its flavor, texture, and shelf life. The goal is to meticulously remove the remaining buttermilk, which, if left present, can lead to quicker spoilage and a slightly tangy taste that some may not prefer.
Traditionally, this process involved adding ice-cold water to the butter and working it with a wooden paddle, repeatedly pressing and squeezing to release the buttermilk. The water is then drained, and the process is repeated several times until the water runs clear.
This thorough washing not only eliminates the buttermilk but also helps to further consolidate the butterfat, resulting in a firmer, more consistent product. Some butter makers advocate for using slightly salted water during the final washes, believing it aids in preservation and enhances flavor. Proper washing is key to achieving a high-quality, long-lasting homemade butter.
Salting the Butter: Flavor and Preservation
Salting butter is a time-honored practice that serves a dual purpose: enhancing flavor and extending its shelf life. While unsalted butter has its place, the addition of salt dramatically improves the taste profile, balancing the richness of the butterfat and creating a more complex flavor experience.
Historically, salt acted as a preservative, inhibiting the growth of bacteria and slowing down rancidity. Even today, salted butter generally lasts longer than its unsalted counterpart. The amount of salt added is a matter of personal preference, typically ranging from ¼ to ½ teaspoon per pound of butter.
To ensure even distribution, the salt should be thoroughly worked into the butter using a paddle or by kneading it gently. Fine sea salt or kosher salt are often preferred for their consistent texture and ability to blend seamlessly. Properly salted butter offers a delightful taste and increased longevity;
Shaping and Storing Homemade Butter
Shaping homemade butter is a satisfying final step, allowing for presentation and convenient use. Traditionally, butter was formed into pounds or half-pounds using wooden paddles or molds, creating attractive blocks for market or home consumption. Today, you can use various molds to create decorative shapes or simply roll it into logs.
Proper storage is crucial to maintain freshness and flavor. Butter should be tightly wrapped in parchment paper or plastic wrap to prevent oxidation and absorption of odors. Refrigeration is essential, extending its shelf life for several weeks. For longer storage, butter can be frozen, maintaining quality for months.
Consider portioning the butter before freezing for easier use. Always use clean utensils when handling butter to avoid contamination. Properly shaped and stored, your homemade butter will remain a delicious treat, ready to enhance your culinary creations.
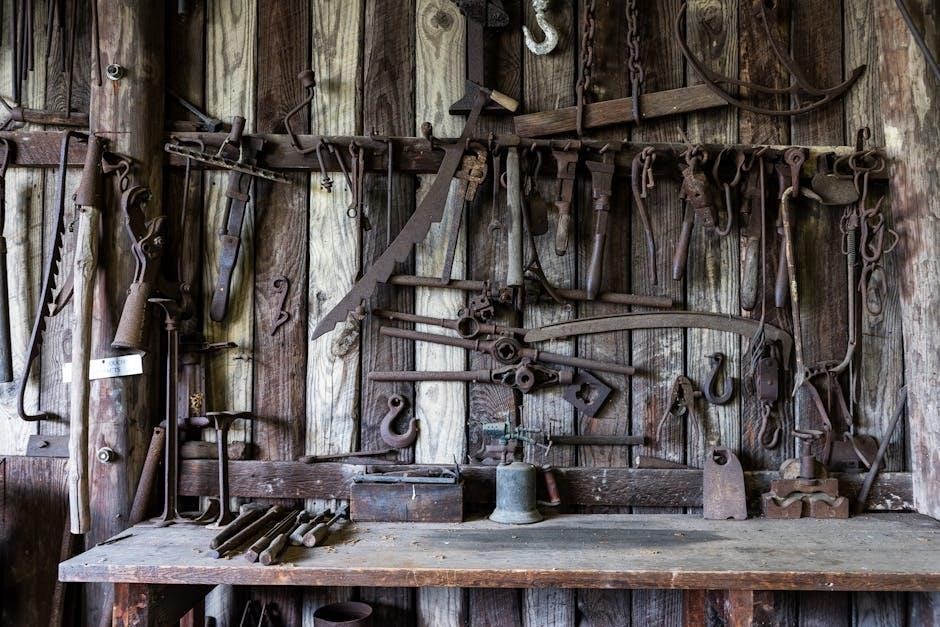
Maintaining Your Manual Butter Churn
Regular cleaning and care are vital for a long-lasting churn. Thoroughly wash and sanitize after each use, ensuring all cream residue is removed to prevent bacterial growth.
Proper maintenance preserves functionality and historical value.
Cleaning and Sanitization
Thorough cleaning is paramount after each use of your manual butter churn to prevent the buildup of cream residue and the growth of bacteria. Begin by immediately rinsing the churn with cool water to remove any remaining buttermilk or butter particles.
Next, disassemble any removable parts, such as the dash or lid, and wash them separately with warm, soapy water. A mild dish soap is generally sufficient; avoid harsh chemicals that could impart unwanted flavors. For the main churn body, use a soft brush or sponge to scrub the interior, paying close attention to corners and crevices where residue might accumulate.
Sanitization is the next crucial step. After washing, a sanitizing solution can be used to eliminate any lingering microorganisms. A common method involves mixing one tablespoon of unscented bleach with one gallon of water. Allow the churn and its components to soak in the solution for at least 10-15 minutes, then rinse thoroughly with clean water.

Finally, allow all parts to air dry completely before reassembling and storing. Proper drying prevents mold and mildew growth. Regular, diligent cleaning and sanitization will ensure your churn remains hygienic and ready for many batches of delicious homemade butter.
Troubleshooting Common Issues
Difficulty in achieving the break – when butter doesn’t form – is a frequent issue; Ensure your cream is at the correct temperature (around 55-60°F) and has sufficient fat content. Insufficient churning speed or duration can also be culprits; maintain a steady rhythm and churn for the recommended time.
If the butter remains too soft, it may indicate excessive moisture. Thoroughly wash the butter with cold water until no more milky residue appears. Conversely, if the butter is too hard, it could be due to overly cold cream or vigorous churning.
Leaks from the churn can occur if the seal isn’t tight or the churn is overfilled. Check the lid and any gaskets for damage and avoid exceeding the recommended fill level. A squeaking sound during churning often indicates dryness; a small amount of food-grade lubricant can resolve this.
Finally, if the dash becomes difficult to move, ensure it’s properly aligned and not obstructed by cream buildup. Consistent maintenance and attention to these details will keep your churn functioning smoothly.
Materials and Durability of Churns
Traditional manual butter churns were commonly crafted from wood, particularly oak, maple, or pine, prized for their strength and ability to maintain a consistent temperature. Wooden churns, if properly cared for, can last for generations, developing a beautiful patina with age. However, they require regular oiling to prevent drying and cracking.
Later models incorporated stoneware or glass jars within wooden frames, offering visibility of the churning process and ease of cleaning. These materials are generally durable but susceptible to breakage if dropped or subjected to sudden temperature changes.
Metal churns, often made of stainless steel or tin-lined iron, emerged for their hygienic qualities and resistance to corrosion. Stainless steel is exceptionally durable and easy to sanitize, making it a popular choice for modern reproductions. The longevity of a churn depends heavily on the quality of materials and consistent maintenance, including thorough cleaning and proper storage.

Modern Revival and Uses
Manual butter churns are experiencing a resurgence, valued as collectibles, educational tools demonstrating heritage skills, and for small-scale, artisanal dairy production.
They connect us to the past!
Butter Churns as Collectibles
Manual butter churns have transitioned beyond their functional purpose to become highly sought-after collectibles, appealing to a diverse range of enthusiasts. Their historical significance, coupled with their often-beautiful craftsmanship, makes them desirable additions to antique collections.
Early churns, particularly those crafted from wood with unique designs or markings, command higher values. Factors influencing collectibility include age, rarity, condition, and provenance – the documented history of ownership. Collectors often seek out specific types, like dash churns with ornate handles or barrel churns featuring distinctive staves.

The aesthetic appeal of these churns is undeniable; they represent a bygone era of self-sufficiency and rural life. Restored churns, carefully preserving their original character, are particularly prized. Beyond their visual charm, owning a collectible churn offers a tangible connection to the past, sparking conversations and showcasing a piece of agricultural history. The market for antique butter churns continues to thrive, driven by a growing appreciation for heritage and craftsmanship.
Educational Uses: Demonstrating Traditional Skills
Manual butter churns serve as invaluable educational tools, offering a hands-on experience in demonstrating traditional skills and connecting individuals with their agricultural heritage. They provide a tangible link to the past, illustrating the labor-intensive processes involved in food production before modern technology.
Schools, historical societies, and living history museums frequently utilize churns to educate visitors about dairy farming and the art of butter making. Demonstrations allow participants to understand the science behind emulsification and the physical effort required to transform cream into butter.
These interactive experiences foster an appreciation for self-sufficiency and the origins of everyday foods. Furthermore, using a churn can spark discussions about sustainable living, food systems, and the importance of preserving traditional crafts. It’s a captivating way to engage learners of all ages, promoting a deeper understanding of history and the value of manual skills.
Small-Scale Dairy Farming and Butter Production
Manual butter churns remain surprisingly relevant in the context of small-scale dairy farming and artisanal butter production, offering a low-tech, cost-effective solution for farmers and homesteaders. While large-scale operations rely on automated machinery, smaller producers often embrace traditional methods to create unique, high-quality products.
Churns allow for small-batch butter making, ideal for farmers’ markets and direct-to-consumer sales. The hands-on process can contribute to a distinctive flavor profile, appealing to customers seeking authentic, locally sourced foods.
Furthermore, manual churning minimizes energy consumption and reliance on complex equipment, aligning with sustainable farming practices. It’s a practical choice for farms with limited resources or those prioritizing a connection to traditional techniques. The resulting butter, often described as having a richer taste, embodies a commitment to quality and craftsmanship.