Nikon D700 Instruction Manual: A Comprehensive Guide
Welcome! This manual provides detailed guidance for your newly unboxed Nikon D700, unlocking its potential for masterful control and precise functionality.
Welcome to the world of professional-grade photography with the Nikon D700! This full-frame DSLR offers a compelling blend of performance, image quality, and robust build. This instruction manual serves as your comprehensive guide, designed to empower you with the knowledge to fully utilize its capabilities.
Whether you’re a seasoned photographer or just beginning your journey, understanding the D700’s features is key. We’ll explore everything from initial setup and camera controls to advanced techniques, ensuring you capture stunning images with confidence. Prepare to master its functionalities!
Unboxing and Initial Setup
Congratulations on your new Nikon D700! Carefully unpack the box, verifying all included items: camera body, battery, charger, strap, and documentation. Insert the battery and charge it fully before first use. Install the strap for secure handling.
Next, attach a compatible lens. Power on the camera and follow the on-screen prompts to set the language, date, and time. Familiarize yourself with the initial menu settings for optimal performance. This simple setup prepares you for capturing incredible images!
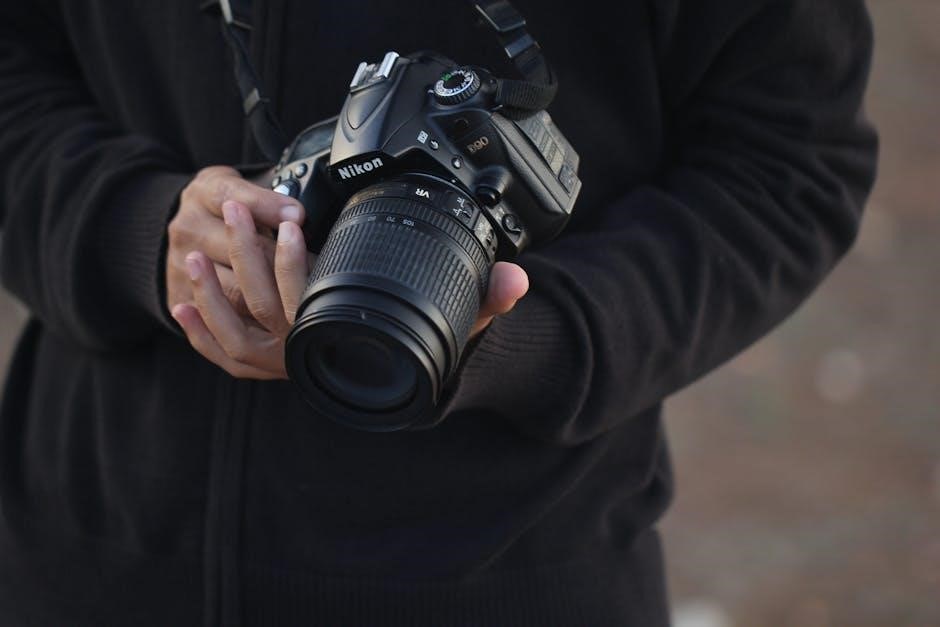
Understanding the Camera Body & Controls
The Nikon D700 boasts a robust and ergonomic design. Take time to familiarize yourself with its layout for intuitive operation. Key components include the mode dial, shutter button, control dials, and various buttons offering quick access to essential settings.
Understanding these controls is crucial for mastering your camera. Explore the front, rear, and top panels to identify each function. Customization options allow tailoring the camera to your shooting style, enhancing efficiency and creative control.
Front and Rear Panel Overview
The D700’s front panel houses the lens mount, autofocus-assist illuminator, and depth-of-field preview button. The rear panel features the LCD screen, control dials, and numerous buttons for navigating menus and adjusting settings.
Pay close attention to the placement of the playback and menu buttons, as well as the directional pad. Understanding the function of each element on both panels is fundamental to efficient camera operation and accessing key features quickly during shooting.
Top Panel Controls and Dials
The Nikon D700’s top panel is command central, featuring the mode dial for selecting shooting modes (Auto, Program, Aperture Priority, Shutter Priority, Manual). The main command dial adjusts settings like aperture and shutter speed, while the sub-command dial offers additional control.
The on/off switch, shutter release button, and exposure compensation dial are also conveniently located here, enabling quick adjustments without taking your eye from the viewfinder.
Button Customization Options
The Nikon D700 offers extensive button customization, allowing photographers to tailor the camera to their specific shooting style. Through the Custom Settings menu, you can assign various functions to buttons like the AF-ON button, depth-of-field preview button, and even the control dials.
This personalization streamlines workflow, providing instant access to frequently used settings and enhancing overall shooting efficiency. Experiment to find what works best for you!
Menu System Navigation
Navigating the Nikon D700’s menu system is crucial for unlocking its full potential. The menu is logically organized into several key sections: Shooting, Custom Settings, and Setup. Access is via the ‘Menu’ button on the camera’s back panel.
Use the multi-selector and dials to scroll and select options. Understanding each menu’s function allows for precise control over camera settings, tailoring the D700 to your photographic needs.
Shooting Menu Settings
The Shooting Menu governs core image capture parameters. Key settings include image quality (RAW, JPEG), ISO range, white balance, and autofocus mode. Explore options for metering, flash control, and active D-Lighting.
Customize settings like exposure delay mode and auto ISO sensitivity. Familiarize yourself with these options to fine-tune image capture to specific shooting scenarios, achieving optimal results with your Nikon D700.
Custom Settings Menu Explained
The Custom Settings menu allows personalized camera operation. Here, you can tailor controls like button assignments, display settings, and autofocus behavior to your shooting style. Adjust settings for the viewfinder display, depth of field preview, and shutter release.
Fine-tune options for audio signals and customize the information displayed during shooting. Mastering this menu unlocks a truly personalized Nikon D700 experience.
Setup Menu – Personalizing Your D700
The Setup menu is where you personalize fundamental camera settings. Configure language, date/time, and display brightness. Adjust the built-in flash settings and customize the information displayed on the LCD screen. Manage file naming conventions and format memory cards directly from this menu.
Reset the camera to factory defaults if needed, ensuring a clean slate for your customized preferences. This menu truly makes the D700 yours.
Focusing System – Mastering Autofocus
The Nikon D700 boasts a sophisticated autofocus (AF) system. Explore various AF modes – Single-servo (AF-S), Continuous-servo (AF-C), and Auto-servo (AF-A) – to suit different shooting scenarios. Fine-tune AF settings like focus points and tracking sensitivity. Understanding these options is crucial for capturing sharp images.
Mastering the AF system unlocks the D700’s potential for dynamic action and precise portraiture, ensuring consistently focused results.

Autofocus Modes and Settings
The D700 offers diverse AF modes. AF-S is ideal for stationary subjects, locking focus when the shutter button is half-pressed. AF-C continuously tracks moving subjects, maintaining focus as they change position. AF-A automatically switches between AF-S and AF-C.
Customize AF settings via the setup menu, adjusting focus point selection, tracking sensitivity, and lock-on behavior for optimal performance in varied conditions.
Manual Focus Techniques
Achieve pinpoint accuracy with manual focus. Engage MF mode on the lens focusing ring, utilizing the viewfinder’s split-image or microprism collar for precise adjustments. Live View offers magnified image display for critical focusing, especially useful for macro or low-light scenarios.
Practice smooth, deliberate adjustments; subtle rotations yield significant focus changes. Remember back-button focus isn’t available natively, requiring traditional shutter button operation.
Exposure Control – Aperture, Shutter Speed & ISO
Mastering the exposure triangle is key. The Nikon D700 offers full control over aperture, shutter speed, and ISO. Aperture dictates depth of field, shutter speed controls motion blur, and ISO manages sensitivity to light.
Utilize the camera’s metering system as a guide, but don’t hesitate to override for creative effect. Understanding the interplay between these settings unlocks your photographic vision.
Aperture Priority Mode (A/Av)
Aperture Priority (A/Av) mode empowers you to select the desired aperture (f-stop) for controlling depth of field, while the camera automatically determines the appropriate shutter speed for correct exposure. This is ideal for portraits, landscapes, or situations where depth of field is paramount.
Monitor the shutter speed to avoid motion blur, and adjust ISO as needed for optimal image quality in varying light conditions. Experiment to find your sweet spot!
Shutter Priority Mode (S/Tv)
Shutter Priority (S/Tv) mode allows you to dictate the shutter speed, freezing motion or creating motion blur, while the camera calculates the corresponding aperture for proper exposure. This is perfect for sports photography, capturing fast-moving subjects, or intentionally blurring water for a silky effect.
Be mindful of the aperture value selected by the camera; adjust ISO if necessary to maintain image quality.
Manual Mode (M) – Full Control
Manual Mode (M) grants complete creative control, allowing independent adjustment of both aperture and shutter speed. This mode is ideal for challenging lighting situations or when a specific look is desired, bypassing the camera’s automatic settings.
Utilize the light meter to achieve proper exposure, and remember to regularly check your histogram to avoid clipping highlights or shadows. Practice makes perfect!
Image Quality Settings & File Formats

Image Quality is crucial for achieving desired results. The Nikon D700 offers choices between RAW and JPEG formats. RAW provides maximum editing flexibility, capturing all sensor data, while JPEG delivers smaller file sizes with in-camera processing.
Explore various image size and compression options to balance detail and storage space. Higher resolutions are ideal for large prints, while lower resolutions suit web use.
RAW vs. JPEG – Choosing the Right Format
RAW files from your Nikon D700 contain unprocessed data, offering extensive post-processing control for adjustments like white balance and exposure. They are larger in size, requiring more storage. JPEG files are compressed, processed in-camera, and ready for immediate use, but offer limited editing latitude.
Choose RAW for critical work needing maximum quality, and JPEG for convenience and quick sharing. Consider your workflow and editing needs!
Image Size and Compression Options
Your Nikon D700 offers various image size options, from large (FX format) to small, impacting file size and detail. Larger sizes are ideal for prints and cropping, while smaller sizes conserve storage space. Compression settings – Fine, Normal, and Basic – further affect file size and image quality.

Fine offers the highest quality, Normal a balance, and Basic the smallest file size with some quality loss. Select based on your intended use!
Using Live View and Video Recording
The Nikon D700’s Live View mode allows composing images on the rear LCD screen, useful for precise framing and challenging angles. Focusing in Live View utilizes contrast-detect autofocus, offering accuracy. While the D700 isn’t primarily a video camera, it does offer HD video recording capabilities.
Explore settings for resolution, frame rate, and microphone input to achieve desired video quality. Remember to utilize a stable surface or tripod for optimal results!
Live View Focusing and Composition
Engaging Live View on your Nikon D700 presents a real-time image on the LCD, ideal for meticulous composition. Focusing shifts to contrast-detect autofocus, offering enhanced precision compared to traditional phase-detection. Utilize focus peaking, if available, to visually confirm sharpness.
Zooming into the Live View image allows for critical focus confirmation. Remember that contrast-detect AF can be slower, so patience is key for accurate results, especially in low light.
Video Recording Specifications and Settings
The Nikon D700 records video in D-Movie format, offering Full HD (1920×1080) resolution at frame rates of 24, 25, or 30 fps. Audio is captured via the built-in microphone or an external microphone connected to the microphone jack.
Adjust settings like aperture, shutter speed, and ISO for desired exposure. Utilize Picture Control settings to customize the video’s look; Be mindful of recording time limits due to file size constraints.
Working with Lenses – Compatibility & Features
The Nikon D700 utilizes the Nikon F-mount, ensuring compatibility with a vast range of Nikkor lenses – both older AI and newer AF-S versions. AF-S lenses provide autofocus functionality, while older AI lenses require manual focusing.
Explore lens aberration correction features within the camera’s menu to minimize distortion and chromatic aberration. Consider lens characteristics when choosing for optimal image quality.
Nikon F-Mount Lenses
The Nikon D700’s F-mount system boasts incredible versatility, accommodating numerous Nikkor lenses developed over decades. This includes both AI-type (older, manual focus) and AF-S type (autofocus) lenses. Utilizing AF-S lenses unlocks the camera’s full autofocus capabilities.
Ensure proper lens mounting and secure locking. Regularly check for dust or debris on lens contacts for optimal performance and image clarity.
Lens Aberration Correction
The Nikon D700 offers in-camera lens aberration correction to minimize distortions and improve image quality. Access these features within the shooting menu, specifically under ‘Lens Corrections’. Options include distortion correction and peripheral illumination correction, automatically applied during image processing.
These corrections can enhance sharpness and clarity, particularly with certain lens models. Remember that applying these corrections may slightly reduce the field of view.
Flash Photography – On-Camera and Off-Camera
The Nikon D700 provides versatile flash photography options, utilizing both its built-in flash and compatibility with external Speedlights. Explore the flash control menu to adjust settings like flash mode (TTL, Manual, Red-eye reduction) and compensation. For off-camera flash, utilize the D700’s commander function to wirelessly control compatible Speedlights.
Mastering flash techniques expands creative possibilities, offering balanced lighting and dramatic effects.

Built-in Flash Settings
The Nikon D700’s integrated flash offers several settings accessible through the camera menu. Options include Auto, Auto with Red-Eye Reduction, Fill-Flash, Hard, and Soft. Flash compensation allows adjusting the flash output intensity, while flash mode selection determines how the flash synchronizes with the shutter.
Understanding these settings is crucial for achieving properly exposed and creatively lit images in various shooting scenarios, enhancing your photographic control.
Using External Flashes (Speedlights)
The Nikon D700 seamlessly integrates with Nikon Speedlights for advanced lighting control. Utilizing the camera’s hot shoe or wireless capabilities, you can achieve off-camera flash photography. Explore Commander mode to remotely control compatible Speedlights, adjusting power and settings directly from the D700.
Fine-tune your lighting with features like High-Speed Sync and Rear-Curtain Sync, expanding creative possibilities and image quality.
Advanced Features – Time-Lapse & Multiple Exposure
The Nikon D700 offers creative tools like Time-Lapse and Multiple Exposure modes. Time-Lapse photography allows capturing slow changes over extended periods, ideal for clouds or blooming flowers. Multiple Exposure combines several images into one, creating surreal and artistic effects.
Experiment with blending modes and image selection to achieve unique visual results, pushing the boundaries of your photographic expression with these powerful features.
Time-Lapse Photography Setup
To initiate Time-Lapse photography, access the shooting menu and enable the Time-Lapse option. Configure the interval between shots, total shot count, and shooting aperture. A stable tripod is crucial for consistent framing during extended exposures. Consider using a remote shutter release to minimize camera shake.
Review the captured sequence in-camera or transfer to editing software for final assembly into a captivating video.
Creating Multiple Exposure Images
The Nikon D700’s Multiple Exposure feature allows blending several images into one. Access this function through the shooting menu, selecting the number of shots (up to nine) and the blending mode – additive, average, or lighten. Compose your first shot, then capture subsequent images, building the desired effect.
Review the final composite image carefully, adjusting settings for creative results.
Troubleshooting Common Issues
Encountering problems? The Nikon D700 displays error messages indicating specific issues – consult the manual for detailed solutions; Common concerns include battery depletion; ensure a fully charged battery and consider power-saving modes. If the camera freezes, try removing and reinserting the battery.
Image quality problems often stem from incorrect settings or a dirty sensor; review settings and clean the sensor carefully.
Error Messages and Solutions
The Nikon D700 utilizes error messages to diagnose problems. “Err” blinking indicates a shutter release issue – try resetting the camera. “F–” suggests a communication error with the lens; reattach it securely. A memory card error (“Card full” or “No card”) requires checking the card or using a different one.
Consult the full error code list in the manual for precise troubleshooting steps and potential solutions to restore functionality.
Battery Life and Power Management
The Nikon D700’s battery life varies based on usage. Expect around 1000 shots with a fully charged EN-EL3e battery under standard conditions. To maximize battery life, disable Live View when not needed, reduce LCD brightness, and utilize the optical viewfinder.
Consider carrying a spare, fully charged battery for extended shoots. Enable battery saving features within the setup menu for optimal power management;
Maintenance and Care
Regular maintenance ensures your Nikon D700’s longevity. Protect it from extreme temperatures, humidity, and dust. Store the camera in a dry, safe location when not in use; Use a soft, lint-free cloth to clean the exterior.
Avoid using harsh chemicals or abrasive cleaners. Proper storage and careful handling are crucial for preserving the camera’s performance and extending its lifespan.
Cleaning the Sensor

Dust accumulation on the sensor can affect image quality. Use a blower to gently remove loose particles first; If necessary, employ a sensor cleaning kit specifically designed for the Nikon D700.
Follow the kit’s instructions meticulously to avoid damaging the sensor. Professional sensor cleaning is recommended for stubborn or persistent dust; Regular checks and careful cleaning maintain optimal image clarity.
Storage and Transportation
When storing your Nikon D700, keep it in a cool, dry place, ideally within its original packaging or a dedicated camera bag. Avoid extreme temperatures and humidity. During transportation, secure the camera to prevent impacts and vibrations.
Protect the lens and body from scratches. Consider using a desiccant to absorb moisture, especially in humid environments. Proper storage and careful transport ensure longevity and functionality;